This guide outlines one way to install DOS games on the Steam Deck. It also explains how to enable a software synthesizer for MIDI music support in those games. Finally, some tips on how one might launch those games conveniently from the Steam Deck's Game Mode are given.
To follow this guide, you will need to input a lot of text on the Steam Deck. While this is doable with the on-screen keyboard, it's not a convenient experience. I'd therefore strongly suggest to either connect a keyboard to the Deck, or to enable SSH access to the deck. I personally recommend the latter, as it also offers a convenient way to copy files to/from the deck.
The first step get SSH working is to enable the SSH server on the Steam Deck. Since the deck is a mobile device and might therefore be used in untrusted networks, I'd strongly suggest to either not have the SSH daemon start up automatically, or to disable password-based logins entirely (of course only after copying your desktop user's public key to the Steam Deck. See either the guide on SSH keys for Linux users, or the guide on SSH keys for PuTTY if you are running Windows).
In order to connect to your Steam Deck, you should be able to use the hostname that you can configure in the Steam Deck settings. I named my deck "grois-steamdeck", and all I have to do to connect to it from my Linux desktop is to run ssh deck@grois-steamdeck on the command line, enter my private key's password, and done. I'd expect the process to be reasonably similar on Windows, using PuTTY.
To copy files you can use (almost) any file manager application on Linux. For instance, file managers using gvfs can just connect using an sftp URL, in my case sftp://deck@grois-steamdeck. I'm not sure if Windows Explorer can access sftp meanwhile, but if not, programs like FileZilla or WinSCP are an adequate option.
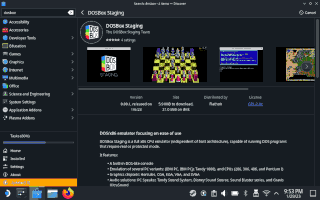
I recommend using DosBOX Staging on the Steam Deck. The main reason is its built-in MIDI software synthesizer. Installing a standalone software synthesizer on the Steam Deck is not straightforward, because of its read-only root filesystem. The built-in synthesizer of DosBOX staging makes this unnecessary though.
The easiest way to install DosBOX Staging is to use Discover in Desktop Mode. All you have to do is to search for "DosBOX Staging" and click "Install".

I'm not sure if the configuration files for DosBOX staging get created when installing it, or when it is first launched. It certainly won't hurt to start and quit it though, just to make sure.
FluidSynth needs a sound font file. You can find a list of sound font files and download links for most of them on the DosBOX Staging WIKI page on MIDI. I personally think that Patch93's SC-55 Soundfont is a good compromise between sound quality and retro feel, but of course that's a matter of taste.
The folder in which the flatpak version of DosBOX Staging searches for Sound Fonts is /home/deck/.var/app/io.github.dosbox-staging/config/dosbox/soundfonts. In case you aren't a seasoned Linux/UNIX user, the . at the beginning of the folder name .var means that this folder is hidden. To see it in Dolphin File Manager, you'll need to enable the display of hidden files/folders therefore.
Now, in order to enable FluidSynth in DosBOX Staging, you'll need to modify the dosbox-staging.conf file. If you are connected over SSH, you can use the nano editor on the command line: nano /home/deck/.var/app/io.github.dosbox-staging/config/dosbox/dosbox-staging.conf. The Steam Deck also comes with the vim editor preinstalled, so if you know how to use it, you can also vim /home/deck/.var/app/io.github.dosbox-staging/config/dosbox/dosbox-staging.conf. Of course you can also just copy the file to your desktop, edit it there with whatever editor you want, and copy it back. The relevant settings are the used MIDI device and the sound font. The MIDI device setting is named mididevice and can be found in the [midi] section. The sound font is configured using the soundfont setting in the [fluidsynth] section.
In my case those settings are (omitting the other fields in the respective categories):
[midi]
mididevice = fluidsynth

[fluidsynth]
soundfont = SC-55.sf2
The sound font can of course also be loaded from a different folder. In that case the full path to the file has to be specified in the dosbox-staging.conf file.
For reference, you can download my current dosbox-staging.conf file
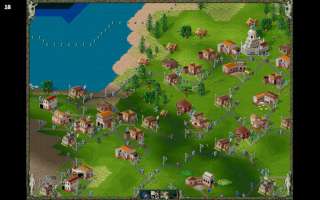
I'll use The Settlers 2 as an example here, because I have it up and running on my Steam Deck and it's working nicely. The procedure should be reasonably similar for any other DOS game.
The version of Settlers 2 I installed on my deck is from GoG. Their download is packaged for Windows only, but on other operating systems one can unpack it using WINE. I guess with a bit of fiddling one could also unpack it directly on the Steam Deck, but I didn't bother and just launched the installer on my desktop to unpack the files.
As already mentioned under SSH access, on Linux almost any file manager will allow to copy the files over SSH.
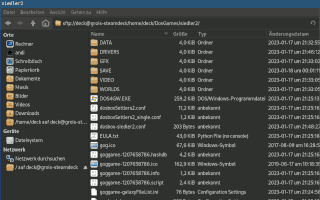
On Windows you might need a dedicated program to use sftp, see SSH access.
You can put the files wherever you like under the deck user's home folder. I'd pick some easy to remember/find path, because it's going to be needed when adding the game to the Steam Library later.
DosBOX Staging uses a layered approach to configuration. This means that one can easily supplement the settings in the global file (the one edited in DosBOX configuration) by a game-specific configuration file.
This comes in handy, because the [autoexec] section can be used to launch the respective game's executable, and other things, like mounting the game's CD. For Settlers 2 for instance, I created a file called "dosbox-siedler2.conf" with the following content:
[sdl]
fullscreen=true
autolock=true

[autoexec]
mount c /home/deck/DosGames/
imgmount d "/home/deck/DosGames/siedler2/settlers2.ins" -t iso -fs iso
c:
cd Siedler2
@VIDEO\SMACKPLY VIDEO\INTRO.SMK
s2
exit
Note that the last line in [autoexec] is exit. This makes sure that DosBOX closes after one quits the game. In that snippet, the mount and imgmount commands are part of DoxBOX and mount the folder with the DOS games as drive C, and the game's CD as drive D. The rest is just regular DOS batch file syntax that launches the SMACKPLY program to play the intro, and then s2 to launch the actual game.
You should now be able to launch the game from the command line:
flatpak run io.github.dosbox-staging -- -conf /home/deck/DosGames/siedler2/dosbox-siedler2.conf
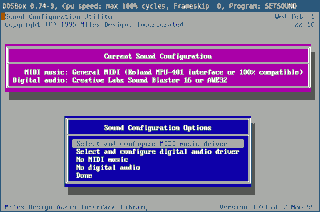
It might be required to configure the game's audio to get actual sound and MIDI output. Since this is only needed once, I'd just do so in Desktop Mode, and suffer the on-screen keyboard for these few inputs. The exact name of the audio configuration utility depends on the game, so consult the game's manual if unsure. In the case of Settlers 2 the program is called DRIVERS\SETSOUND.EXE in the game's install folder. The commands to run it would therefore be:
mount c /home/deck/DosGames/
c:
cd Siedler2
cd DRIVERS
SETSOUND
Unless you changed the DosBOX settings regarding sound, you should usually be able to use "SoundBlaster" or "SoundBlaster 16" for digital audio, and "General MIDI" for music.
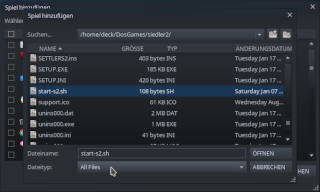
The easiest way to add a DOS game to the Steam Library is to write a short launcher script. I simply named mine "start-s2.sh" and put it into the game's install folder, so I can find it easily. This file can be rather simple: Just a Shebang and the command to launch the game. For instance:
#!/bin/bash
flatpak run io.github.dosbox-staging -- -conf /home/deck/DosGames/siedler2/dosbox-siedler2.conf
The script needs to have the "execute" permission set. The command to do that is chmod +x start-s2.sh. Of course you can do that using a graphical file manager too. I'm not sure if any Windows sftp programs allow you to modify the permissions on a file though. Just to be sure it works, it might be worth trying to launch the game from the command line.
If you now open Steam in Desktop Mode, you can go to the "Games" menu, and click "Add a Non-Steam game to My Library...". Click the "Browse" button at the bottom of the selection window, and navigate the file browser to the folder where you put the launch script. Make sure to select "All Files" for the "File Type", as Steam will not show executables otherwise.
After adding the game, the entry in the library will be named just like the script. This can easily be fixed by right-clicking it, and opening the "Properties" window. The text-box right at the top allows to change the game name.
Last, but not least, the game needs some artwork in Steam, to make it recognizable. I recommend the excellent SteamGridDB website, which offers artwork for a lot of games, including many DOS games. They even have a tool to easily set the artworks in Steam, named SGDBoop.
Now everything should be up and running, so it's time to enjoy the actual game.

Previous: The maths behind passwordmaker-rs-0.2 Home Next: Adventures with Free Monads and higher